Methods for Post-Processing Habitat-Mapper Output1
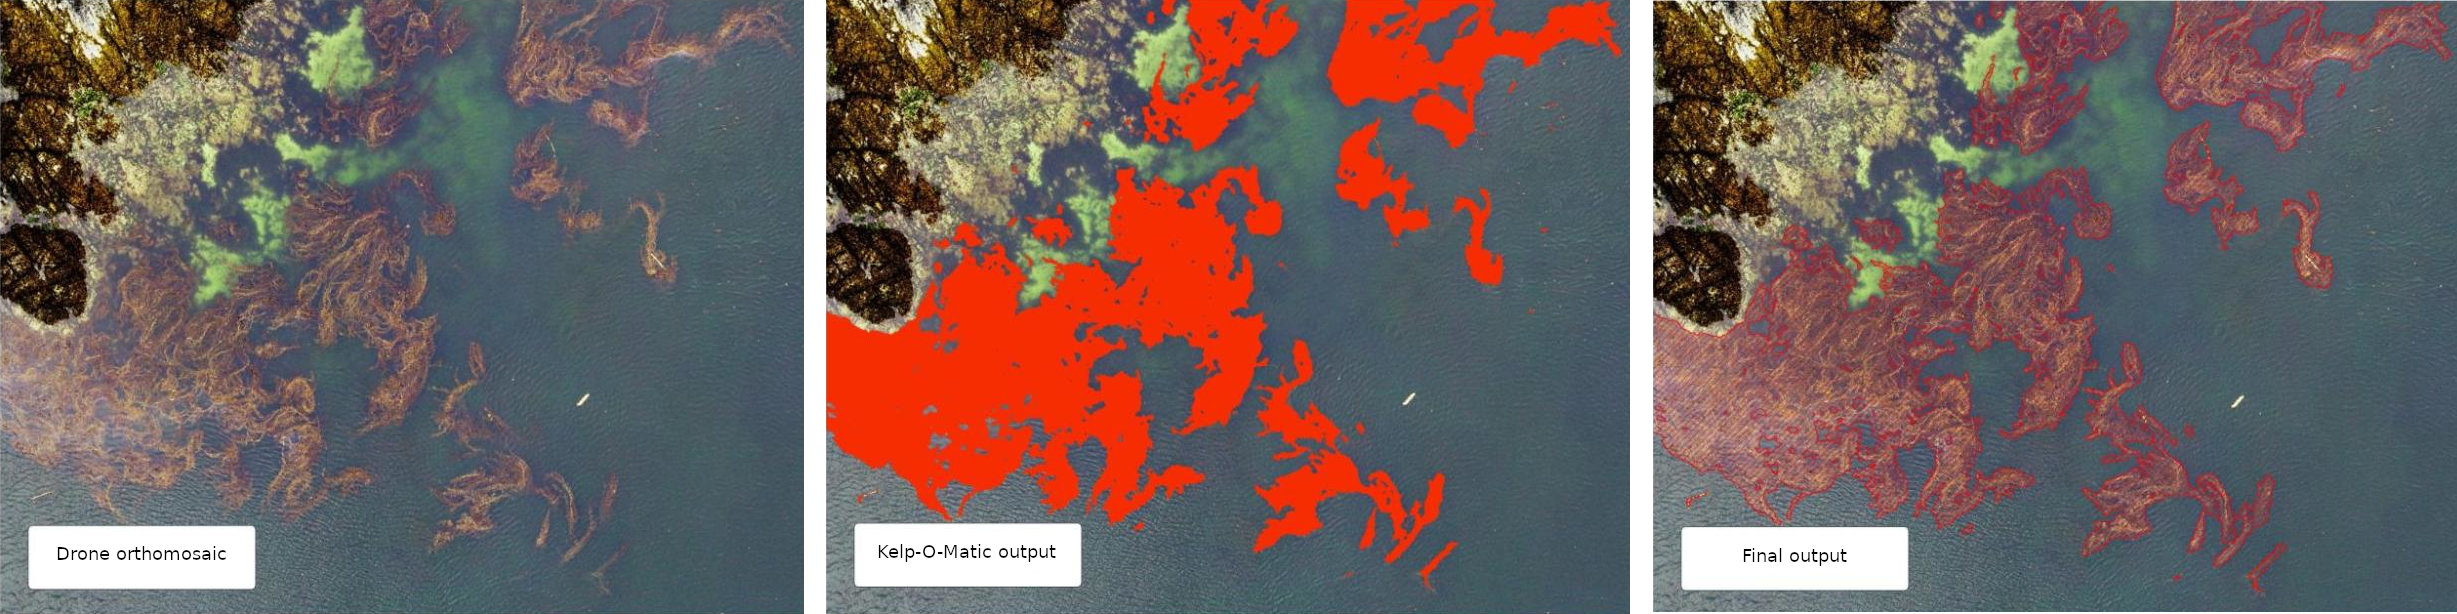
This document describes the methods used for generating analysis ready data on species-level kelp extent from outputs from the Habitat-Mapper tool. Final outputs consist of polygon features (.shp) that contain species-level classification of emergent canopy kelp present in drone imagery.
These instructions use ArcGIS Pro (version 3.4+), but can also be adapted for QGIS (a free, open-source alternative). The core workflow is the same across GIS platforms.
QGIS Equivalents
If using QGIS instead of ArcGIS Pro, the equivalent tools are:
- "Raster to Polygon" → Raster menu > Conversion > Polygonize (Raster to Vector)
- "Field Calculator" → Open Attribute Table > Open Field Calculator (calculator icon)
- "Calculate Geometry" → Field Calculator with expression
$area - "Select by Attribute" → Select Features Using an Expression (toolbar button)
For questions, please contact Luba Reshitnyk at the Hakai Institute.
Workflow Overview
graph TB
    A[/"Raw Habitat-Mapper output (.tif)"/]-- Open in ArcGIS Pro -->B["Convert to polygon feature (raster to polygon)"];
    B-->edit
    subgraph edit [Edit]
        direction TB
        C[Remove polygons < 0.2m<sup>2</sup>]-->D[Manually remove non-kelp polygons];
        D-->E[Manually digitize kelp canopy that was missed];
        E-->F[Fix any misclassified species];
    end
    edit-- Have secondary analyst review, time permitting -->G[/"Final output (.shp)"/]
Detailed Workflow
This section assumes that you have obtained output from the Habitat-Mapper (.tif) and have a new instance of ArcGIS Pro (3.4). These same steps can be done using other GIS software (e.g. QGIS)
Tip: ArcGIS Pro Keyboard Shortcuts
Keyboard shortcuts can make the editing process much faster. To enable some, go
to Customize > Customize Mode > Keyboard….
Some useful shortcuts include:
- Edit tool (set to Ctrl+E)
- This lets you toggle to the editor tool.
- Delete (set to Ctrl+D)
- Delete selected polygon features.
- Freehand tool (set to Ctrl+R)
- Toggle to freehand tool to manually digitize kelp feature polygons.
- Clip (set to Ctrl+W)
- Quickly draw a polygon then click ctrl+W to delete the polygon features within the newly drawn polygon. Then delete that polygon.
Load Habitat-Mapper Raster
Load the output .tif file from Habitat-Mapper into ArcGIS Pro. The raster will have the
following
attributes:
| Output value (gridcode) | Class |
|---|---|
| 0 | Background |
| 1 | Kelp (presence mode) |
| 2 | Macrocystis (species mode) |
| 3 | Nereocystis (species mode) |
Convert to Polygons
Convert this raster into polygons using the Raster to Polygon tool in ArcGIS Pro.
- Uncheck
simplify polygons - Leave the other defaults as they are
Add New Attributes to Polygons
Note - if you are exporting to GDB you don't need to calculate area
- Add a new
areaandspeciesfield - Right-click the layer in the Contents pane
- Select
Attribute Table - Click the
New Fieldbutton in the Fields tab of the ribbon- Name =
area, Type =Double - Name =
species, Type =Text - Click
Saveon the fields tab of the ribbon
- Name =
- Calculate the area for each polygon
- Right-click the
areaheader in the attribute table, selectCalculate Geometry...- Property =
area - Units =
square meters - Coordinate system = choose an appropriate projection that preserves area ( e.g. NAD83 BC Albers Equal Area EPSG = 3005)
- Click
OK
- Property =
- Right-click the
Editing and Data Cleaning
Delete small polygons that are unlikely to be kelp
- Right click layer in the table of contents, Select
Open attribute table. ClickSelect by attribute - Select features < 0.2 m2 by typing:
"area" < 0.2 - Right click highlighted features in attribute table and click
Delete Selected - Save edits
Manually delete non-kelp polygons
There may be areas where the Habitat-Mapper classifier falsely detected kelp and these polygons need to be removed manually.
- Select using the edit tool or
Select by Lassotool - Delete the selected polygon(s)
- Save edits.
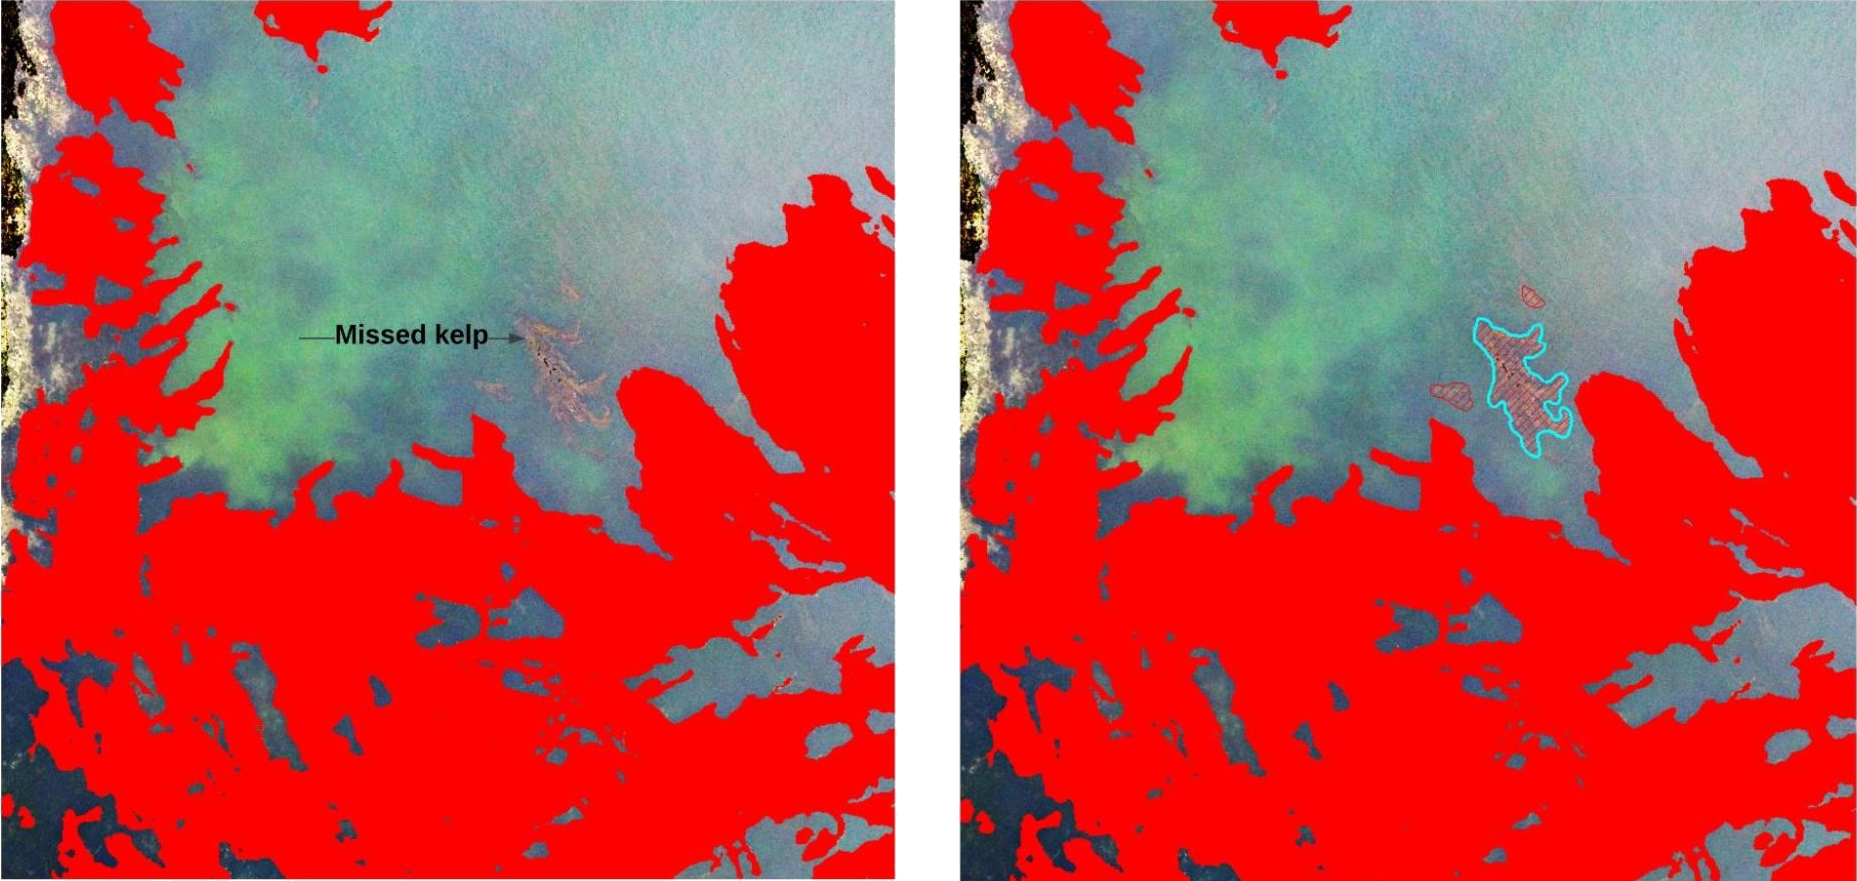
Add kelp not detected by Habitat-Mapper
If there are locations where emergent canopy kelp was missed by the Habitat-Mapper classifier ( example in figure below) manually digitize these features using the Freehand Tool. You will need to manually classify these new regions to species (change value in the attribute table). A 1:100 scale is recommended.
Review Species Attributes
There may be some areas where the Habitat-Mapper classifier misclassified the species in a given area. These polygons can be edited manually. If you're just interested in presence/absence don't worry about this step.
- Select all polygon features classified as giant kelp by opening the attribute table
and
select by attribute. Select features representing giant kelp by typing:"gridcode" = 2. At the bottom of the attribute table click on theShow selected recordstab. - Right-click the
speciesfield you created earlier. SelectField Calculator. - In the text box enter
Macrocystis pyrifera(with quotes included) and click OK. This will fill out that attribute for all the selected polygons.
Repeat steps 1 - 3 for bull kelp by using "gridcode" = 3 and Nereocystis luetkeana.
- Review all the polygon species classification and manually change ones that the Habitat-Mapper
classifier
misclassified by changing the text in the
speciesfield for that polygon feature. - Save edits.
- Delete the
gridcodeattribute once you are done. - Save edits.
Export Data
That's it! You can now export your data a shapefile or gdb feature class and give it an appropriate name.
-
Created by Luba Reshitnyk, February 2023 ↩